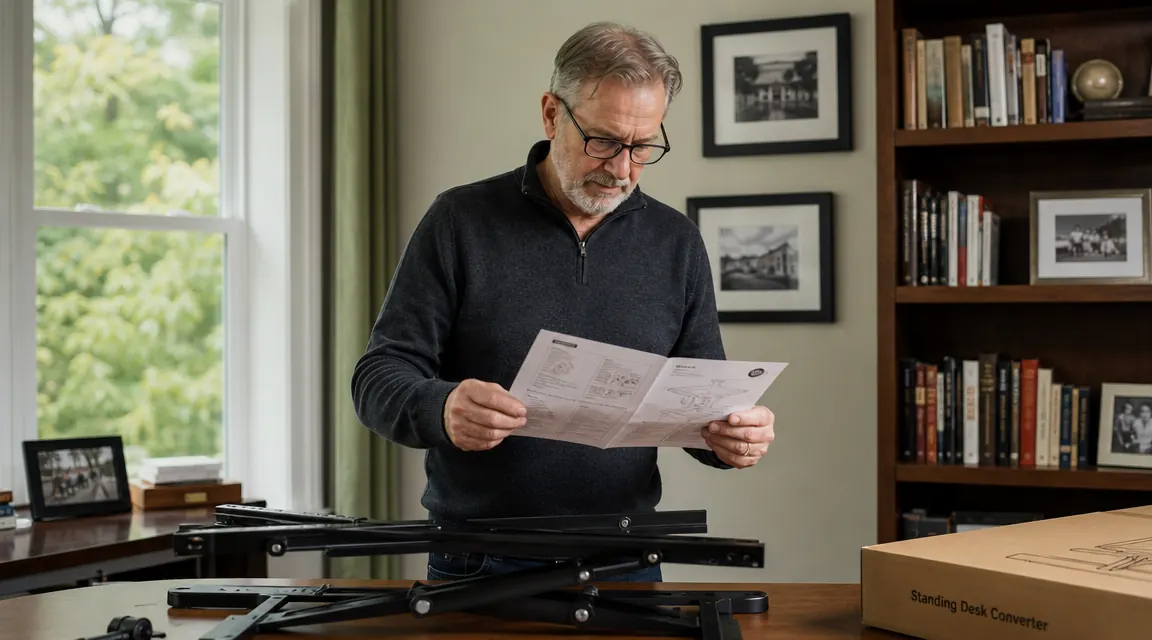
I spent thirty years building things with my hands, and if I learned anything from that trade it is this: a bad setup at the start costs you twice as much to fix later. When I put my VIVO 42-inch desk converter on my existing workshop desk last spring, I made the mistake most people make. I just lifted it to a comfortable-looking height, dropped my monitor on the riser shelf, and started working. Three days later my neck was telling me what my eyes had missed. The geometry was off. The monitor was too low, the keyboard shelf was pitched wrong, and I was standing with my chin out like a turtle looking for a lettuce leaf.
A standing desk converter is a real upgrade for a home office, but only if it is dialed in correctly. Get the heights right and you will notice the difference inside of a week: less afternoon stiffness, fewer headaches, and a back that feels like it did actual work instead of punishment. Get it wrong and you will chalk it up as a fad and box it back up. This guide walks through every adjustment in the order that matters, so you can get it right the first time without trial and error.
Your neck is tired of being craned at the wrong angle. Start with a converter that adjusts smoothly.
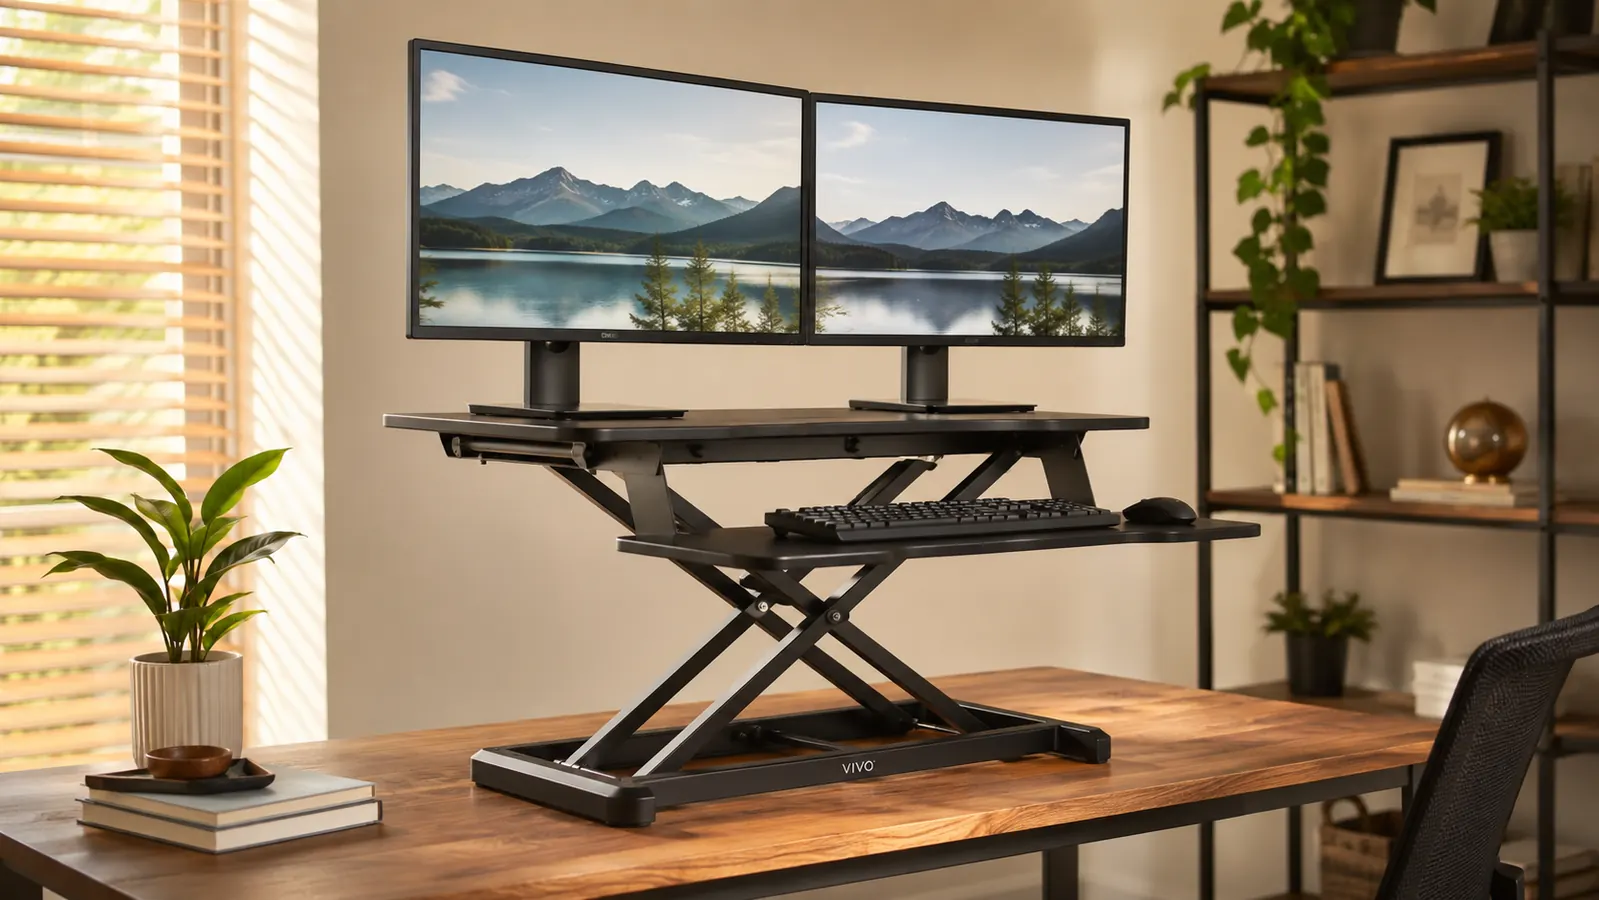
The VIVO 42-inch V Series is the converter I use. It has a wide dual-monitor surface, a separate keyboard tray, and a spring-assist lift that holds its position without fighting you when you adjust. Over 10,000 reviews and a 4.6-star average back it up.
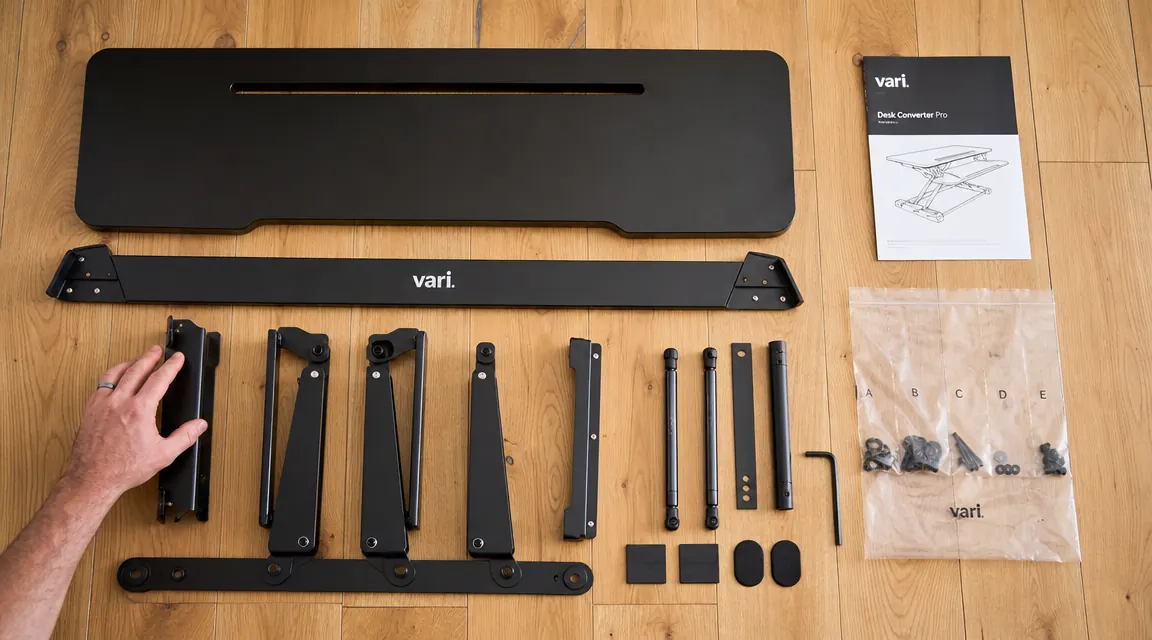
Amazon Check Today's Price on Amazon →Step 1: Place the Converter on a Stable, Level Surface
Before you adjust a single height, check what you are putting the unit on. The converter sits on top of your existing desk, so that desk needs to be solid and level. Grab a small level or use a free phone app. A desk that rocks even slightly will transfer that movement up through the converter, and at full standing height you will feel every wobble. I used a shim under one rear leg of my desk to take out a quarter-inch slope I had been ignoring for years. Took five minutes and made the whole setup feel twice as solid.
Next, think about where on the desk you place the converter. Most people center it, which works. If you are right-handed and keep a notebook or a mug to one side, slide the converter two or three inches toward the non-dominant side so your writing hand has elbow room when you sit. Also confirm the desk is deep enough: the VIVO 42-inch needs about 24 inches of front-to-back depth when fully lowered. If your desk is shallower than that, the keyboard tray will hang past the edge when in the seated position.
Finally, look at the floor beneath your standing position. If it is hardwood or tile, mark that spot now. You will want to lay an anti-fatigue mat there before you start working standing up. Skip this step and your feet and lower back will remind you by hour two. We will come back to the mat in Step 5, but pick your mat before you finish the physical placement so you know where your standing footprint lands relative to the rest of the room.
Step 2: Set the Keyboard Tray Height for Your Elbows
Most setup guides start with the monitor, but a carpenter would tell you to measure from the floor up, not from the top down. Start with the keyboard tray, because your elbow height dictates everything else. Stand up straight in your work shoes or socks, whatever you normally wear at your desk. Let your arms hang naturally at your sides. Now bend your elbows to ninety degrees, as if you are about to type. That height, from the floor to the bottom of your forearm, is the correct keyboard surface height for standing.
On the VIVO converter the keyboard tray adjusts independently of the main surface using a lever on the underside. Lift the converter to your approximate standing height first, then fine-tune the keyboard tray so that when your fingers rest on the home row your wrists are flat, not bent up or drooping down. A bent wrist in either direction will cause fatigue in about an hour. Flat means flat. If you find yourself hovering with straight wrists and your shoulders are riding up to make that happen, the tray is too high. Drop it a notch.
For seated height, repeat the same process. Sit with your feet flat on the floor and your thighs parallel to the ground. Bent elbows to ninety degrees again. That is your seated keyboard height. Lower the entire converter to seated height and confirm the tray is in the right spot. Write down both positions, standing and seated, by counting spring-resistance clicks or noting the position number on the lift column. You will be switching positions multiple times a day and you do not want to hunt for the right height each time.
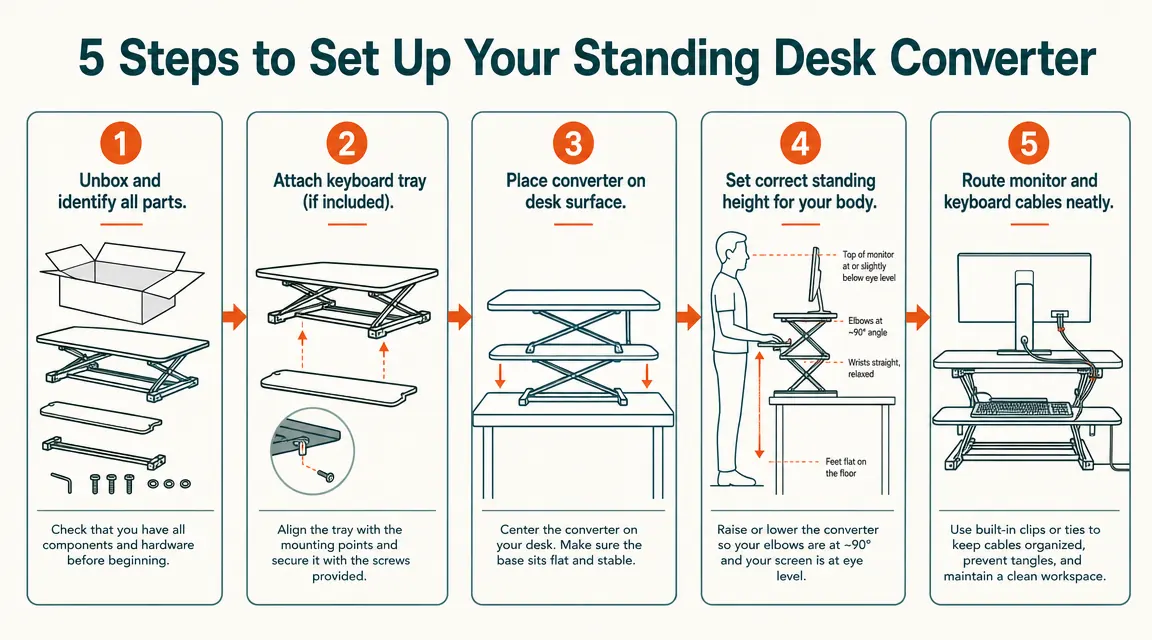
Step 3: Dial In Monitor Height and Distance
With the keyboard tray set, lock the converter at your standing height and place your monitor on the upper shelf. The single most common mistake at this step is setting the monitor too low. People treat the desk surface as a natural resting place and leave the monitor flat on the shelf. That forces you to look down, which puts the back of your neck into a constant low-grade strain. Over an eight-hour day that adds up to a stiff neck by dinner.
Correct monitor height for standing: the top edge of the screen should be at or just below your eye level when you are standing with your head in a neutral, relaxed position. Not tilted down, not tilted up. Straight ahead. If your monitor is short, use a small riser or a hardcover book under it on the converter shelf to bring the top edge up to that level. The VIVO shelf is wide and flat, so a wooden block or riser fits cleanly on it without wobbling.
Distance matters too. Extend one arm straight out in front of you while standing. Your fingertips should just about touch the screen. That is the minimum comfortable distance for most people at normal monitor sizes. If you are using a 27-inch or larger monitor, you may need to push it back another few inches. Closer than arm's length and your eyes are working harder than they need to. Farther than 28 to 30 inches and text gets harder to read at normal zoom levels. The VIVO shelf on the 42-inch model gives you room to push the monitor back while still keeping the keyboard tray forward, which is one of the things I like about its design.
Step 4: Build Your Sit-to-Stand Rotation and Actually Follow It
A converter you only use standing is not a standing desk, it is an expensive monitor riser. The whole point is the alternation. Spending eight hours on your feet is not better than spending eight hours in a chair. Your legs will fatigue, your lower back will start to ache, and you will conclude that standing desks are overrated. The research and the real-world experience both say the same thing: the benefit comes from moving between positions, not from standing all day.
Stand for twenty to thirty minutes. Sit for the same. Move, shift your weight, take a short walk every two hours. The converter is not the whole answer, it is just the tool that makes the movement easier to do without disrupting your work.
A simple pattern that works: start your morning session seated for the first thirty minutes while you get your bearings. Then stand for twenty to thirty minutes. Sit again. Repeat. After lunch I tend to stand for longer, maybe forty-five minutes, because that is when I feel the post-lunch drag and standing keeps me sharper. By late afternoon I am usually back to sitting. Over a full workday that means I am on my feet for two to three hours out of eight, which sounds modest but is a meaningful change from sitting all day.
Use a phone timer or a simple app for the first few weeks. The transitions happen naturally once your body learns the rhythm, but at the start it is easy to get absorbed in work and stay in one position for three hours without noticing. Even a simple phone alarm labeled "switch" that goes off every thirty minutes is enough to build the habit. Once it is a habit, you will start shifting positions without being told, often mid-task, which is exactly what the ergonomics research says is the ideal behavior.
Step 5: Add an Anti-Fatigue Mat and Run a Final Geometry Check
An anti-fatigue mat is not optional. If you plan to stand at all, get one. They work by creating a slightly unstable surface that causes the small muscles in your feet and calves to micro-adjust constantly. That small movement keeps circulation going and reduces the compression fatigue you feel in your feet and lower back after standing on a hard floor. I resisted buying one for the first week because I figured my work boots would be enough cushion. They were not. A decent anti-fatigue mat costs less than a doctor's office copay and lasts for years.
Place the mat directly in front of the converter, centered on where your feet land when you stand at the keyboard. It should be wide enough that you can shift your weight side to side without stepping off the edge. When I shift my weight to one foot, lean on the desk edge with my forearms for a minute, or rock slightly heel to toe, I stay on the mat. That is the size you want. A 20 by 32 inch mat handles most people comfortably.
Once the mat is in place, do a final geometry check. Stand in your normal working position. Head neutral, arms at your sides. Raise the converter to your standing height. Drop your hands to the keyboard. Wrists flat? Good. Look at the monitor. Top of the screen at or just below eye level? Good. Now look straight ahead. Is your chin level, or are you jutting it forward or tilting it back? If your chin is out, the monitor is too far back. If you are looking upward, the monitor is too high. Small adjustments at this stage cost nothing and save real discomfort.
What Else Helps
A converter handles the vertical geometry, but a few supporting pieces make the setup noticeably more comfortable over the long haul. A good ergonomic chair matters as much for the seated half of your day as the converter does for standing. If your chair puts you in a poor position when you sit, you are giving back half the benefit. Cable management keeps the converter from becoming a tangle as you raise and lower it throughout the day. A simple cable spine or a few hook-and-loop ties routed up one side of the lift column keeps everything clean. Lighting also matters more than most people expect. A monitor at the correct height in front of a bright window will still cause eye strain. Position your monitor perpendicular to windows rather than facing them or backing them. For more on building the full converter setup from scratch, the full review covers six months of daily use on the VIVO 42-inch: see the VIVO desk converter review. And if you are still on the fence about whether a converter actually solves the problems you are dealing with, the seven things a desk converter fixes piece lays out what to realistically expect.
Five steps done. The VIVO is what I used, and after six months it still lifts and holds without complaint.
The VIVO 42-inch V Series converter has a separate keyboard tray, a wide dual-monitor surface, and a spring assist that makes single-handed position changes easy. Rated 4.6 stars from more than 10,000 buyers. If you are setting up a home office desk converter for the first time, this is the one to start with.
Amazon Check Today's Price on Amazon →